Fastener Technology

3 Advantages of Using Thread Forming Screws

Thread Forming Screws

Not taking advantage of thread forming screws in your design? You may be missing out on some performance enhancements and cost savings! From plate steel and sheet metal to thermoplastics and aluminum, consider multifunctional fasteners for your next design.

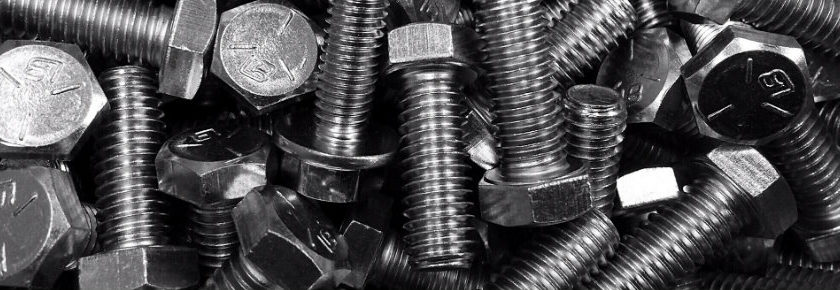
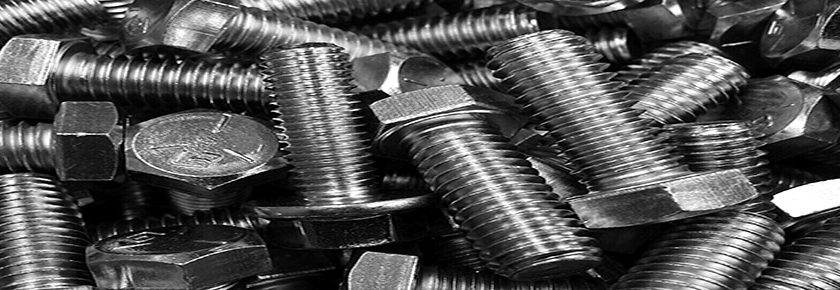
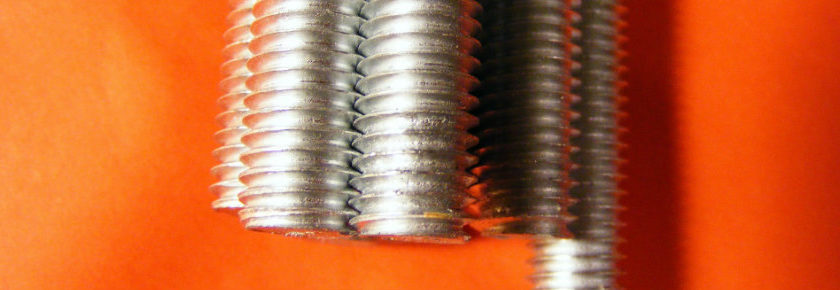
What exactly are thread forming screws? Thread forming screws have the same basic thread pitch as a standard machine screw, with harder threads and different point geometry to create their own threads into an untapped hole. This eliminates tapped holes or nuts and locking features which may be necessary with conventional nut and bolt assemblies.
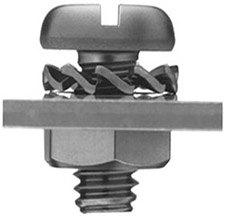
Self-Locking Effect

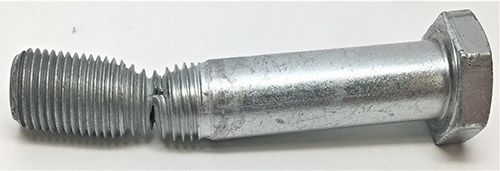
One of the big benefits of thread forming screws is the self-locking effect. Because they form their own threads, there are no gaps between male and female threads. This can lead to rotational loosening under vibration loads. This self-locking feature alone can be a good reason to switch.

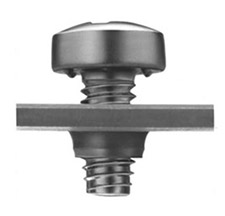
Reduction of Fasteners

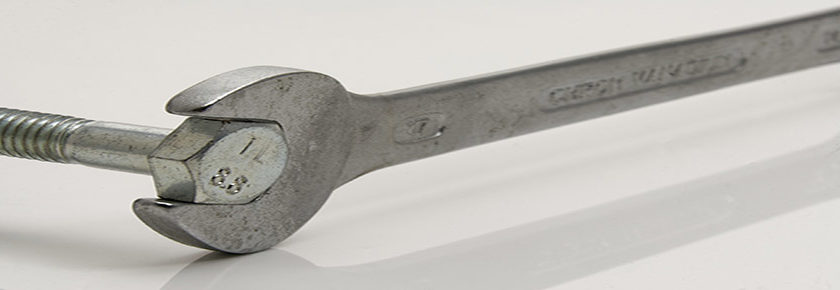
By eliminating nuts or costly tapping operations, as well as locking washers, adhesives or other locking elements, realizing cost savings over the entire joint is possible. Not to mention reducing the number of fasteners and operations needed for conventional assembly.

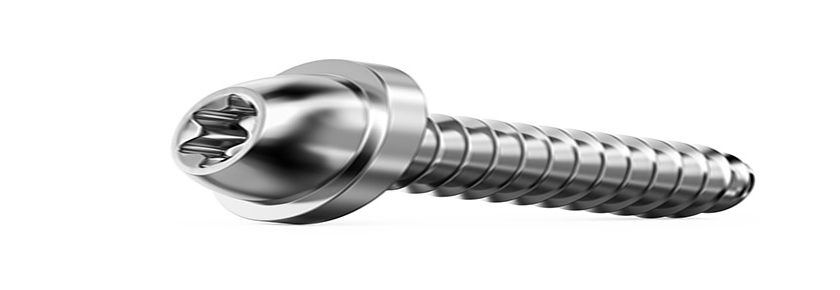
Specialty Thread Formers for Light Alloy Metals and Plastics

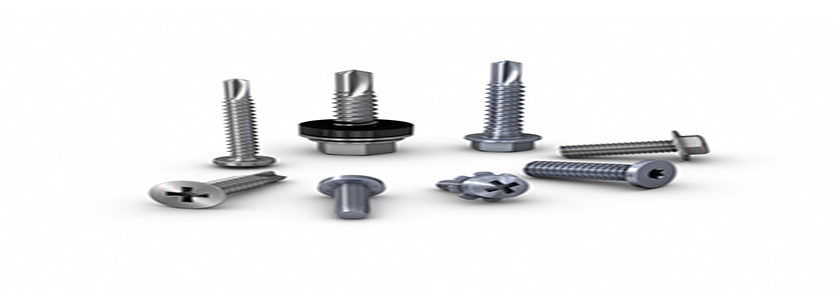
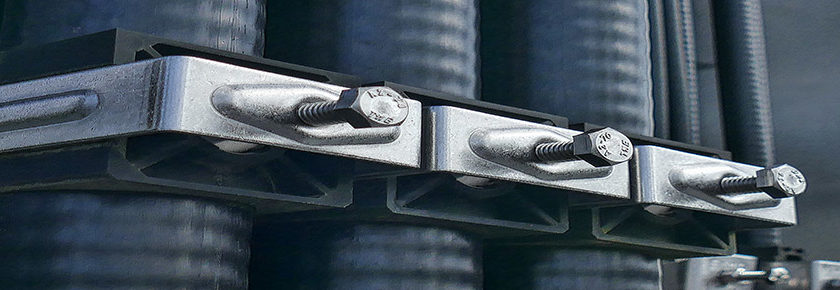
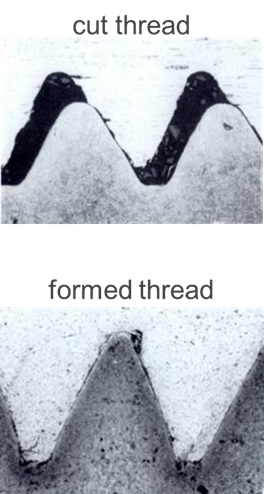
Many specialty type thread forms exist for assembly into light alloys such as magnesium or aluminum. They also exist for various thermoplastic materials. For some harder thermoplastics or thermoset plastics, adding a cutting feature can lessen the stress on the material. This will still create threads into the material eliminating tapping or costly threaded inserts.

For more details on thread forming screws, Bossard offers Expert Education seminars as webinars or in person at your facility, tailored to your specific questions and needs. Contact us at ProvenProductivity@bossard.com for more information.

Doug Jones
Applications Engineer
djones@bossard.com

May 31, 2019
Read More

The Anatomy of a Fastener

The Antatomy of a Fastener

Designing fastened joints begins with a good basic knowledge of fasteners. Many engineers think they know enough about fasteners to make good decisions, but what is your level of knowledge? Here is some good information with questions at the end to test your knowledge:

Drive Styles

What is the difference between the Philips drive and the Pozidrive?

  • Applying too much torque to a Philips drive will cause it to “cam out” to avoid breaking the screw. This is beneficial for certain hand assemblies by consumers. For production assembly, it is not ideal due to tooling wear and operator fatigue if assembling by hand.
  • Pozidrive has different geometry which transfers more torque into the screw with less downforce. In a production environment, whether by hand or automated assembly, tooling will last longer and achieving a specific torque without the drive slipping is possible.

How do you tell the difference?

Pozidriv has four “tick marks” on the face of the drive for identification.

Do they use the same driver?

Property Class/Grade

How do you determine the strength of a fastener by looking at the head?

The grade or property class marks are on the head.

  • Left – property class 8.8 metric with the “8.8” stamped on the head
  • Middle – three slash marks equally spaced is imperial grade 5, which is the same strength as metric property class 8.8
  • Right – six slash marks equally spaced is imperial grade 8 which is stronger than grade 5

What does the triangle and the “ABCD” mean on the head? What does 8.8 stand for on the head of the metric fastener? What is the grade of fasteners below?

To check your answers to the questions above, contact us at ProvenProductivity@bossard.com to set-up a seminar at your facility, or keep your eyes open for our first webinar covering “The Anatomy of a Fastener”.

More than the basics, this seminar takes things to the next level by covering bolted joint principles and fastener manufacturing.

Doug Jones
Applications Engineer
djones@bossard.com

May 24, 2019
Read More

How to Cost Efficiently Design a Bolted Joint

Designing for Cost Efficient Assembly

Often times when designing a bolted joint we try to use standard, off the shelf fasteners for the lowest cost, but the cost of the entire assembly is not considered. Take the example below found in an electric lamp:

Conventional Fastener Solution

Conventional Fastener Solution

Here we have three fasteners, a machine screw threading into a clinch nut, and incorporating an external tooth lock washer to create a good ground for a ring terminal. Seems like a pretty good, cost-efficient joint, right? But let’s look at another possible solution:

Multi-Functional Fastener Solution

Multi-Functional Fastener Solution

This solution incorporates a multi-functional thread forming screw with nibs under the head to create our needed grounding contact. The screw itself is more than three times as expensive as the machine screw above. If we look at the total cost of the assembly, we can see the savings.

Fasteners/Assembly Machine Screw Thread Forming Screw
Screw M4 x 8 $1.36/C $4.50/C
Clinch nut M4 $10.41/C n/a
Assembly of nut $17/C n/a
Mfg of pilot hole $14.88/C 14.92/C
Toothed lock washer $1.02/C n/a
Assembly of washer 4.25/C n/a
Total Cost $48.92 $19.42

The multi-functional fastener solution results in a 60% cost reduction over the conventional solution.

Bossard offers Expert Education seminars as webinars or in person at your facility, tailored to your specific questions and needs. For a full seminar on Cost Efficient Assembly, contact us at ProvenProductivity@bossard.com.

May 10, 2019
Read More

How to Create Secure Fastened Joints

Securely Fastened Joints

What is the key to getting your fastened joints tight and keeping them tight? This is one of the biggest headaches that engineers face today. But with a little education and understanding of the bolted joint, the problem becomes easier to tackle.

Bolts Act Like a Spring

Believe it or not, we want bolts to stretch when we tighten them. By stretching bolts up to, but not beyond their yield strength, they act like a spring. This creates the desired tension in the joint to prevent clamped members from slipping and putting a shear load on the bolt. Bolts are only about 60% as strong in shear as they are in the axial direction, so avoiding this sideloading is key to designing good joints.

How long should your spring be for optimal joint retention? A clamping range of five times the diameter of the bolt is ideal if tightened. For example, an M10 bolt should have fifty millimeters of distance between the head and the nut when tightened to perform at its very best. Junkers vibration testing has proven this to be the best combination to avoid rotational loosening.

What about joint settling? Knowing the surface pressure of the material you are bolting together, compared to the surface pressure of the fastener is key. With the wrong combination, you can get joint settling and loss of clamp load which can lead to fatigue failure.

For more information on how to create secure joints, Bossard offers Expert Education seminars, both as webinars or in person at your own facility, tailored to your specific questions and needs. Contact us at ProvenProductivity@bossard.com for more information.

May 03, 2019
Read More

Cracking Plastic and How to Avoid It

Fastener Failures

Another common fastener failure happens when assembling into plastic. Most often noticed in free-standing bosses, cracking or pulling threads out of plastic can often be an issue if the joint design is incorrect.

If you experience such a failure, it can likely trace back to the type of fastener, or the design of the hole.

Thread Types

There are many different specialty thread types developed to form threads into thermoplastic material. Yet many engineers still resort to using sheet metal tapping screws for these joints. Tapping screws for sheet metal have a 60° flank angle, which is not ideal for plastic and can stress and break or pull threads out of the plastic if the hole size is too large. Specialty screw threads such as PT® and Delta PT ® have a reduced flank angle and special geometry that will create much greater clamping force, breaking the screw before it will strip threads in the plastic.

Hole Size

Correct hole size and design are also important regardless of which type of screw you choose. Hole size will depend on the type of plastic you are using, but all holes should have a counterbore to prevent the material from pulling up and creating an uneven bearing surface at the top.

For more information on designing joints for direct assembly into plastics, check out our technical section at www.bossard.com or contact us at ProvenProductivity@bossard.com.

April 26, 2019
Read More

What Is Hydrogen Embrittlement?

Fastener Failures

Hydrogen embrittlement (HE) is a delayed, catastrophic failure of a bolted joint. The biggest indicator of this type of failure is that it occurs after installation, within 24 – 48 hours, but never during assembly. Common candidates for this type of failure are high strength, electroplated, threaded parts. Other non-threaded, high strength electroplated parts such as retaining rings, lock washers and spring pins may also be at risk. Threaded parts which have failed from HE will break at the fillet radius under the head, or at the first stressed thread root and not show any signs of stretching or necking down.

HE Concern

Three things must be present for HE to be a concern:

  1. High strength steel, greater than Rockwell C 36
  2. Introducing hydrogen through a process such as acid cleaning, electroplating or corrosion
  3. A high sustained tensile or bending load must be present

Eliminating any one of these three conditions will eradicate the risk of HE.

If you have a delayed failure, look for the three conditions above and contact your fastener experts at Bossard at ProvenProductivity@bossard.com for more analysis.

April 19, 2019
Read More

How To Avoid Fatigue Due To Low Clamp Load

Fastener Failures

In fastened joints subjected to external loading, the design and selection of fasteners become very important. The bolt or bolts joining the pieces together should create more clamp load than the external forces can generate. If the clamp load is correct, the bolts will never feel the outside forces. But, if the clamp load is too low, fatigue failure may result, especially in cyclical loading.

If the external loads on the joint exceed the clamp load, joint decompression, or joint separation will occur. The repeated joint separation will likely lead to exceeding the fatigue endurance limit of the thread, which is much lower than the tensile strength of the bolt.

Avoid Loaded Joint Fatigue Failure

How can we avoid fatigue failure in high cyclical loaded joints? Performing a joint study to ensure proper clamp load is key, as well as knowing your external loads and selecting the proper grade/property class of fasteners. Often fatigue failure tempts engineers to increase the strength of the bolt. If tightened, this may help to create more clamp load, but the fatigue endurance limit of higher strength bolts is very like lower strength versions.

Consider other safeguards such as special root radius threads, or rolling threads after heat treat, to increase the fatigue endurance limit.

For more information on keeping your joints together, contact us at ProvenProductivity@bossard.com.

April 12, 2019
Read More

Why Fasteners Fail: How to Prevent Vibrational Loosening

Fastener Failures

Our next look into common fastener failures concerns joints which loosen over time, due to vibration.

Many joint applications only see static loading or external loading. These types of loading are erratic and not exceeding the strength of the fastener which holds things together. When tightened, these joints rarely loosen. But there are also joints which see cyclical loading and, in some cases, very high-frequency cyclical loading which causes vibration. Even if the load is not very high, if you use incorrect fasteners, loosening can occur.

Threads of a fastener are ramps that wrap around the shaft in a helix. Tightened fasteners rely on friction to keep from ‘sliding down the ramp’ or loosening. Friction is important not only in the thread flanks of a fastener but also at the bearing surface. Too much friction in a joint and we do not create enough clamp load, but too little friction can lead to loosening.

Some joints are more prone to loosening under vibrational forces:

  • Soft joints which cannot create enough clamp load to stretch the fastener without damaging the mating surfaces
  • Very short bolted joints which may support higher clamp loads, but do not give the bolt enough length to stretch

Solving Vibrational Loosening

What are some steps to take to solve vibrational loosening?

  • Remove the source of vibration: in the case of a rotating member, consider balancing the parts to reduce vibration
  • Add friction to the threaded components: thread forming screws or adhesive locking patches may be a good option
  • Add friction to the bearing surfaces: serrated nuts, screws or washers may be worth looking into

For more details on solving vibrational loosening problems, contact us at ProvenProductivity@bossard.com.

April 05, 2019
Read More

Why Your Fasteners are Yielding

Fastener Failures

When things break or fall apart, fasteners often get unfairly blamed for the trouble. In many cases, the fastener is not to blame.

Yielding fasteners are typically brought about by too much torque. An externally threaded fastener which has been over-torqued will generally stretch and “neck down” causing an hourglass shape as pictured below.

Fastener Failures

If your fastener looks like this, it has been over tightened. Does this mean that the bolts are weak, or that they are bad bolts? No, it simply means that the amount of load applied to the fastener exceeded the bolt’s mechanical properties.

Three key factors need to be analyzed to understand this failure: the grade or strength of the fastener, torque, and friction.

1.Grade/Strength

Make sure that the strength of the fastener has been properly selected for your application and verify the head markings on the fastener to make sure that someone didn’t use the wrong part.

2. Torque

Was a certain torque prescribed for the joint? If so, was the proper tool and correct torque used to assemble the fastener? Torque charts exist as guidelines for tightening fasteners, so verify that the correct torque was used. It may also be wise to verify the calibration of the tool used. If no torque was specified, then care must be taken not to over tighten.

3. Friction

If the joint was tightened with a calibrated tool to the recommended torque, and if the bolt has the correct strength, but it still looks like the picture above, then what? In this case it is likely that some lubrication has gotten into the threads or under the bearing surface of the joint to lower the friction, transferring more torque into a higher load which exceeds the bolt’s strength. Look for signs of oil or grease which can be transferred from gloves or nearby sources. Eliminating the additional lubrication will often take care of the issue.

For more information on solving fastener joint failures, contact us at ProvenProductivity@bossard.com.

March 29, 2019
Read More

Inch or Metric? Check the Head Marking!

Inch or Metric - Check the Head Marking

If you are like me and like to wrench on things, whether it’s fixing a car or repairing the snowblower, you probably have a set of inch and metric wrenches. Sometimes you can determine which set you need by the age or brand of whatever it is you are fixing. Anything made in the United States prior to 1980 is probably not using metric fasteners, while most other parts of the world have never used inch fasteners. If your project was manufactured in the US in the 1980s or 90s, you may see both inch and metric, which may drive you crazy unless you learn a bit about head markings.

Standard headed fasteners, both inch and metric, are required to have a grade or property class marking on the head if it has been heat treated. Also, on the head should be the manufacturer’s identification marking like the triangle in the pictures below. Inch fasteners define their strength (grade) by slash marks as indicated below for grade 5 and grade 8.

Metric fasteners define their strength (property class) with two numbers separated by a decimal point such as 8.8 or 10.9 which are the most common.


Property Class 8.8

So, next time you grab a wrench for a project, take a look at the head of the bolt to see which type of wrench you’ll need!

For more information regarding fastener markings, visit www.bossard.com or contact us at ProvenProductivity@bossard.com.

March 22, 2019
Read More