Torque and Galling

Prevent Galling While Tightening Stainless Steel Fasteners

Prevent Galling While Tightening Stainless Steel Fasteners

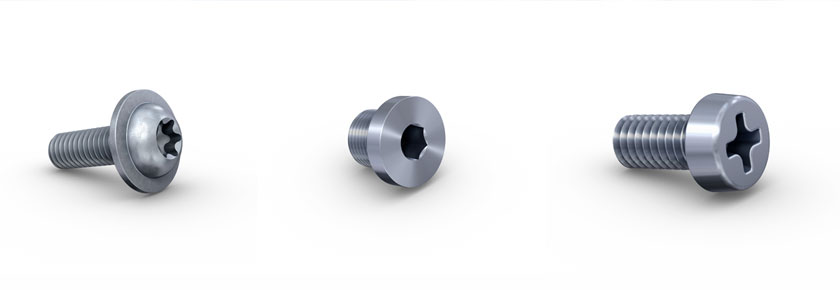
Whenever two poorly lubricated metal surfaces come into contact, you have a strong chance of galling damage. Galling is a kind of cold-welding process in which two metals that are in contact with one another eventually adhere to one another. Galling is especially troublesome for titanium, aluminum, and stainless-steel fasteners.

A protective oxide layer provides some galling prevention, but the tighter the connection, the more likely the oxide layer will become damaged and enable galling to begin. The following is a closer look at common causes of thread galling on stainless fasteners.

Torque and Galling Effects

The coefficient of friction between stainless steel fasteners is higher than most other combinations, requiring more torque to achieve the proper clamp load. If a high clamp load is desired in stainless steel fastened joints, often galling will occur before enough clamp force is produced, which is not always clear to the assembler. Two things can occur, either we have a low pre-load, or the bolts will twist off.

High Temperatures and Galling Effects

Service conditions can cause additional challenges for stainless steel joints, for example, high temperatures and/or exposure to aggressive gasses which are prevalent in applications such as gas turbines or diesel engines.  Thermal expansion can cause permanent distortion while heat and gasses can cause scaling on the surfaces making disassembly difficult during service or repair.

How to Counteract Galling

Lubrication added during assembly is one method of minimizing the galling effect of the threads in stainless steel joints. Molylub, with solid molybdenum disulphide particles or other solid film lubricants containing silver, aluminum, or copper may also be used. Lubricants containing graphite are not advised due to reactions between carbon and chromium at higher temperatures.

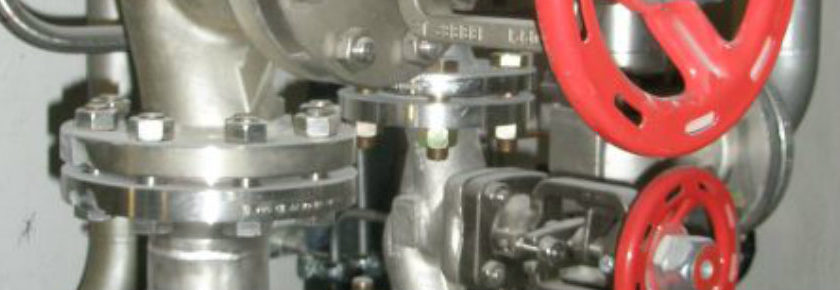
Teflon sealing tape may also be used for larger threaded components such as pipes and valves.

Pre-Applied Coatings

To avoid the mess of traditional lubrication, and the possibility of forgetting to apply it, a pre-applied lubricant may be the best option for galling prevention. Wax or similar topcoats may be applied with a dip-spin method or more advanced tribological coatings such as Bossard ecosyn®-lubric can be used. Tribological coatings are highly engineered to reduce wear and maintain consistent friction which helps to achieve a consistent joint pre-load.

Interested in learning more about galling and how to properly tighten stainless steel fasteners? Email us at ProvenProductivity@bossard.com to get in touch with a Bossard Engineer.


EMAIL US


NEXT UP

20% productivity gain, 0 complaints

0 broken screws plus increased productivity thanks to solid material analysis

August 06, 2021
Read More

3 Types of Joint Studies

Joint Study

The purpose of a joint study is to understand the forces acting on the assembly during tightening. A joint study may be necessary if you have a critical joint or if you are having warranty claims that can be linked back to joint failure.  When is a joint considered critical? If the failure of the joint may cause injury or have a serious monetary impact, it should be considered critical.

Typical Types of Joint Studies

1.Torque Tension Analysis

This study is used to make sure that your prescribed torque is achieving your intended clamp load. Low clamp load may lead to loosening through embedment, rotational loosening and/or fatigue which all can result in failure of the joint. High clamp load may yield the fasteners or the mating joint components, lowering their clamping force which can also result in failure of the joint.

2.Drive & Strip Torque Analysis for Thread Forming Screws

Performance of thread forming screws in both metal and plastic are greatly dependent on the hole size and preparation. The correct hole size should offer a good balance between low drive torque and high strip torque which can be determined through testing. These types of joints aren’t often as sensitive to the amount of clamp load they retain, but choosing the proper hole size and assembly torque will greatly affect the joint’s performance.

3.Vibration Analysis

Joints subjected to vibrational forces may experience loosening and eventual failure if not designed properly. Different types of fasteners and locking features are often utilized to address vibrational loosening. Performing a vibration study helps to select the proper hardware for your specific situation.

To learn more about joint studies and to talk to an engineer about your project, contact us through ProvenProductivity@bossard.com.


Doug Jones
Applications Engineer
djones@bossard.com

April 13, 2018
Read More

How to Find Your Correct Torque Like a Pro

All design engineers are faced with questions like “What torque is the correct torque?” and “How do I know my assemblers are achieving the correct torque?”. When Bossard engineers hear these questions we typically respond by asking “What clamp load are you trying to achieve?”. When asked, engineers usually reply with confused expressions, or the unveiling of a torque chart from engineering manuals or colleagues.  There is no doubt time and effort went into these torque charts, but how does the testing to create the chart relate to the application the engineer is working on?

Bossard’s biggest piece of advice is to test, test, test! The approach that yields the most success and maximizes the strength of fasteners is to test the application until failure. Until you know the point that the current fastener fails, you are throwing darts at your target clamp load. In some instances, friction varies from lot to lot and can affect the clamp load enough resulting in loose fasteners. Testing until failure helps you achieve a baseline average of total fastener strength. This baseline encompasses friction and is incontestable. The only thing left for the engineer to decide is the percentage of the baseline that is needed for the application. Typically, 75% of the failure torque is used for assembly but there are times in critical applications that fasteners are needed to be pushed further.
When investigating current torque strategies at your company don’t be afraid of torque charts. They can often be used as a great starting point. When a clamp load needs to be met to hold something together, challenge the tightening strategy and test it to prove its validity. You will never regret testing the actual application.

Have more questions about clamp load and proper torque? Reach out to Bossard at ProvenProductivity@bossard.com to receive personalized advice from one of our Application Engineers!

Ben Oostdik
Application Engineer
boostdik@bossard.com

October 20, 2017
Read More

Methods for Calculating Appropriate Tightening Torque

When you are trying to determine the tightening torque you need for a fastener, there are a couple ways you will want to go about it. It may seem like a fairly easy answer, but that is not always the case.

Use a Torque Calculator

Using a torque calculator to determine the approximate tightening torque is a good place to start. This calculator will request information such as the coefficient of friction, the bolt strength and diameter. A torque calculator is a good way to get started and get an approximate tightening torque, however, it will not be exact in all situations. This is why after using a calculator, it is a good idea to perform some joint testing to verify your results.

Test Your Torque

Once you arrive at the proper torque requirement, you may want to test your torque values to verify the accuracy of your assembly tools. This is important because it helps you ensure the safety, reliability and quality of your project.

You will need a calibrated hand torque wrench to verify the tightening torque of your fasteners. You can select from the First Movement Test, the Loosening Test and the Marking Test as an indication of the applied torque:

  1. The First Movement Test will involve applying force to your torque wrench after the fastener has been tightened. You will do this until the first movement of the fastener is noted.
  2. The Loosening Test requires that you turn the fastener in the opposite direction to loosen it. You will record the torque when the fastener first breaks loose.
  3. For the Marking Test, you will need to mark the fastener and continue to mark onto the surface being clamped. Then you will loosen and retighten until the marks match up.

It is important to use the proper torque on your project to ensure safe, reliable joints. To learn more about torque and methods for measuring it, contact Bossard at ProvenProductivity@bossard.com.

March 17, 2017
Read More

What Fastener Drive Should You Use?

Fastener drive options

What Fastener Drive Should You Use?

Picking a fastener drive may not seem like a big decision to make, but if you choose the wrong one it can have a significant effect on the assembly of your project and the time it takes to complete your project. It is important to make sure you have the right one, and we can help you come to that decision!

The best fastener drive is always the one that is most effective in transferring torque to the fastener to achieve clamp load.

There are many different types of fastener drives and you will want to use the one that best holds your project together and also achieves a good assembly speed. Some of the types of drives are slotted, Phillips, Frearson, combination, hex, one way, square, and six lobe.

The slotted screw and drive were the first to come about because they were very simple. The problem was that fastener drives can more easily slip out of the slot and damage the screw head or product, so cross drives like the Phillips, Frearson, and combination were created. These drives allow for higher torque because they have greater bit engagement. This leads to quicker assembly, so cross drives such as these should be considered if you are trying to speed up your assembly process. Cross drives are also good for screws with low torque because the cross allows the drives to more easily maintain bit engagement to achieve more torque.

Other types of drives include the square, hex, or six lobe recess. These were designed to be used when high torque is required to achieve maximum clamp load. Most high volume production fasteners will use these types of drive recesses. They also require little effort to maintain bit engagement minimizing drive strip out issues.

It can be frustrating trying to fasten something on a project because you may feel like you aren’t making any headway. Picking the correct fastener drive for the job can make your project go a lot more smoothly. Contact Bossard at ProvenProductivity@bossard.com if you have any questions about fastener drives and choosing the best one for your job.

June 17, 2016
Read More

What is Proper Torque?

proper torque

Throughout a typical day, our engineers are asked at least once, “What torque should I use?” for any given size and application. This question is very loaded and requires many details to arrive at a hypothesized torque. The torque is considered hypothesized until testing is performed on an actual application. Until it is tested, it is not confirmed.

The factors that govern any “proper” torque strategy are the strength of the fastener, the surface pressure limits of the mating material, and the friction under the head and in the threads. The ultimate goal of torque is clamp load, so these factors essentially influence total clamp load. Total clamp load, or preload, in most applications is required to keep anything together.

The most common method of finding the proper torque is looking it up on a torque chart. Most companies have some sort of organized torque chart based on size and some refer to the surface finish of the fastener. This is an attempt to consider the friction of common fastener finishes. Our engineers would rate this method very low on an accuracy scale when a specific clamp load is desired. The method we recommend to any design engineer requires a load cell and measuring of the clamp load while tightening. This confirms the design and the engineer’s desired clamp or preload. The torque to get to this clamp load will be the proper torque.

When friction varies and the clamp load needs to be achieved every single time (like a head bolt on an engine) a torque turn method is the proper choice. This method takes a bit more testing to be repeatable but is very accurate. By testing several joints and measuring the clamp load and torque simultaneously, a snug torque can be acquired and then an angle-of-turn added. The snug torque may only be a tenth of the final torque but the angle-of-turn can and will produce accurate and repeatable clamp. For more information on this method, and help determining this angle, contact us any time at ProvenProductivity@bossard.com.

Please read and subscribe to our blog to receive information and tips about Bossard Proven Productivity.


May 27, 2016
Read More