Fastener Technology

2 Solutions for Fastening in Lightweight Applications

2 Solutions for Fastening in Lightweight Applications

In 2018, original equipment manufacturers want to create the most innovative and unique products, all while making sure they are as lightweight as possible. Whether its vehicles or electronics, they are all becoming less bulky and less heavy.

To produce these lightweight products, manufacturers are using different materials than what might have been used just a few years ago. Composites like carbon fiber and fiber glass are the new normal when it comes to materials. Metals like aluminum and magnesium are also becoming more popular. But assembling these products can prove to be challenging.

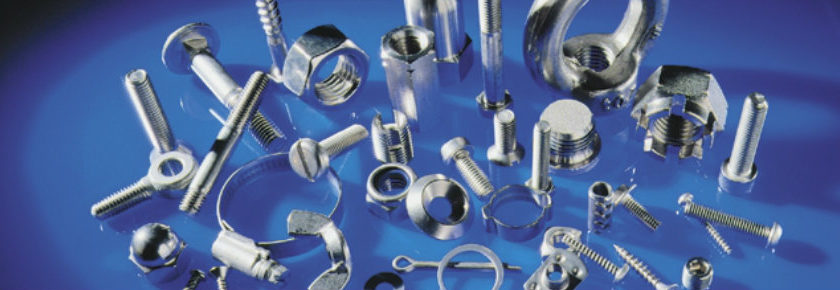
Fortunately, Bossard has a variety of solutions for how design engineers can use fasteners safely and effectively in these relatively new materials. Here are two of our most popular fasteners for these applications.

bigHead

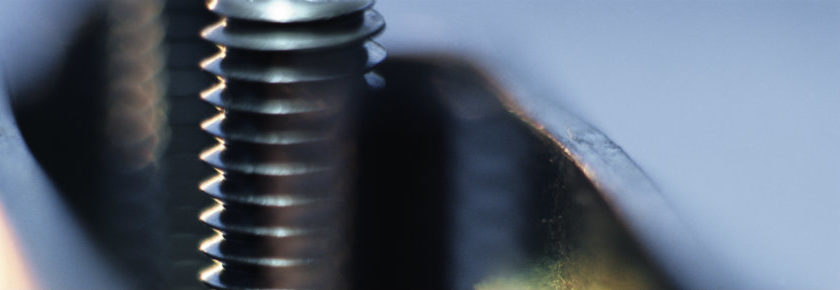
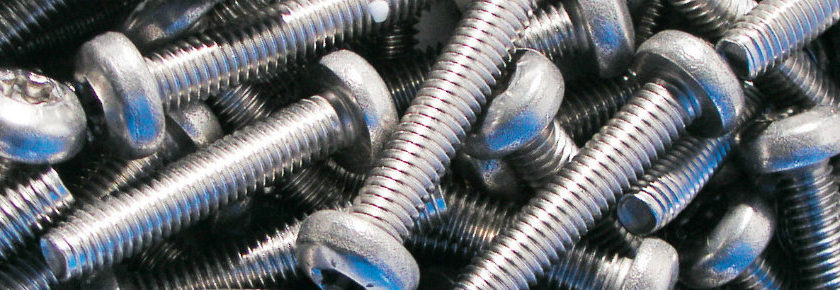
bigHead is one of the best options for fastening when using composite materials. They consist of a standard fixing welded onto a head. These unique fasteners can be secured via adhesives or by embedding directly into the material. They can be used with carbon fiber, steel, stainless, and more materials.
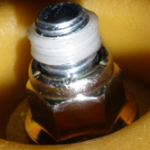
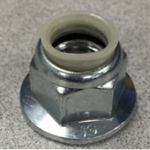
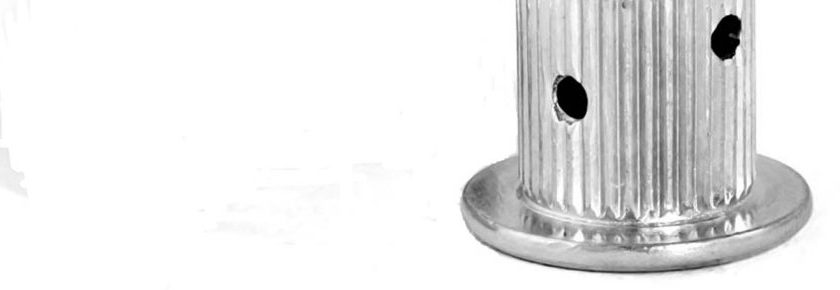
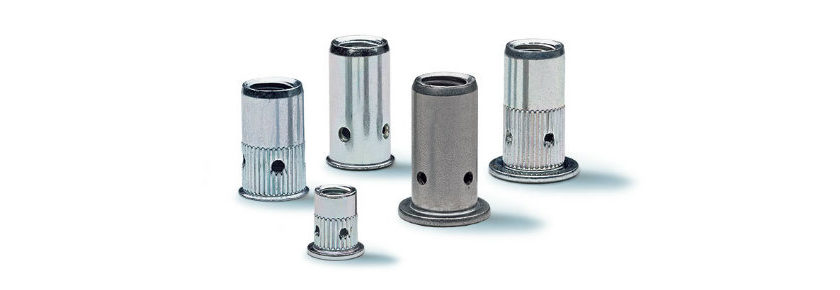
BCT®

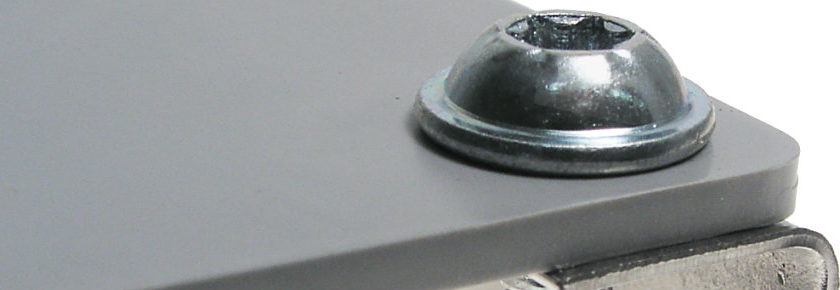
BCT®* is not your typical rivet nut. What makes these blind rivet nuts different from others is that they are designed with strategically placed holes around the body of the nut where the rivet nut body will begin to collapse, controlling where the bulge happens. Hence, BCT® – bulge control technology. BCT® is also great for aluminum, stainless steel, and other lightweight materials

There are four main types of BCT®: bulge control, micro, high strength, and multigrip.

For more information about fastening with lightweight materials, contact us at ProvenProductivity@bossard.com.

*BCT® is a registered trademark owned by BBA srl Italy
June 29, 2018
Read More

3 Solutions for Nylon Insert Nut Challenges

Challenges with Nylon Insert Nuts

If you use nylon insert lock nuts in production, it is more than likely that you have run into some issues like the ones pictured below:

Nylon Insert Nut 1 Nylon Insert Nut 2 Nylon Insert Nut 3

Causes

Why does this happen, and usually only in January through March?

The inserts are made of 66 nylon which is hydroscopic, meaning it can absorb moisture up to 8% of its weight. When exposed to temperature extremes and low humidity, the nylon will lose moisture and can shrink slightly and in some cases become brittle. These conditions are not relevant once the insert is installed, but if the nylon has become too dry prior to assembly, then we can see problems like those pictured above.

Certain assembly conditions can contribute to failure of a dried out insert, such as:
• Poor or no chamfer on mating threads
• Long thread engagement
• High assembly speed
• Any combination of the above conditions

If the insert is very dry and brittle, and the mating thread has a poor chamfer, we can see breaking of the nylon, especially if the assembly speed is very fast as with an impact gun.

Long thread engagements coupled with high speeds seem to heat-up the dried out nylon enough to cause it to extrude out the top of the nut. This can happen with properly hydrated nylon as well, especially if the pitch diameter of the mating thread is at the upper end of tolerance (the nylon has to go someplace) but it seems to happen more when the nylon is dried out.

In extreme cases of dried out inserts, such as those run through a bake oven for some type of post finish (zinc flake for example), the inserts may spin freely in their cavity prior to installation. When the mating part is introduced, some inserts may be pushed out of the nut without even forming threads into the nylon ring.

Solutions

  1. Packaging/environment
  • Wherever possible, keep nuts sealed in their original containers until they are ready to be consumed.
  • Do not store more nuts than needed in extreme cold and/or dry environments.
  1. Assembly
  • Check for chamfers on mating parts – a smooth entry into the nylon will lessen potential problems.
  • Avoid long thread engagement if possible.
    • If not possible, adjust speed down to lessen heat build-up.
  • Check speed of assembly – try slowing down the speed if problems occur.
  1. Additional Insert Material
  • If these solutions do not resolve the issues, then consider another type of insert material.
  • High temperature materials are available that are not as sensitive to environment.

For questions, please contact our Engineering team at ProvenProductivity@Bossard.com.

For more shopping options click here.

Doug Jones
Applications Engineer
djones@bossard.com

June 22, 2018
Read More

3 Types of Rivet Nut Tools for Assembly

Rivet Nut Tools for Assembly

Rivet nuts were discussed in a previous blog, but what tools are required to install this type of fastener?

Hand Tools

Smaller rivet nuts can easily be set by hand using simple tools. The nuts are threaded onto a mandrel by hand, inserted into the hole and then using a mechanical lever action, the mandrel is pulled into the tool causing the nuts to collapse on the back side of the hole. The tool must then be manually rotated in reverse to disengage from the nut.

Spin/Spin Tools

These tools are typically pneumatic and have three stages. The first spin assembles the nut onto the threaded mandrel. The nut is then placed into the prepared hole, and the second stage spin collapses the nut on the backside of the hole creating a bulge. This bulge squeezes the material, and secures it into place. The third stage reverses the rotation and backs the mandrel out of the nut. These tools are the lowest cost power tools, but can be a bit fussy about hole size. Too large of a hole can allow the rivet nut to spin and not collapse. The pressure that the nut applies once the bulge is formed is controlled by the amount of torque that the gun creates, so consistency can be an issue if air pressure and/or friction in the threads varies.

Spin/Pull Tools

These tools also have two stages and are typically pneumatic over hydraulic. The first stage spins the nut onto the mandrel while the second stage does not rotate, but instead pulls the mandrel into the tool collapsing the rivet by force. This tool comes in two versions:

  • Pull to pressure – the amount of setting force is set by hydraulic pressure, which can be adjusted on the tool. This style works best if the material thickness is not consistent.
  • Pull to stroke – the amount of setting force is set by the distance of the stroke, which can also be adjusted on the tool. This type of tool works well for materials that are very consistent in thickness.

Some high-end tools incorporate both pull to pressure and pull to force.

For questions about rivet nuts and or tooling, check out www.bossard.com or contact Bossard directly at ProvenProductivity@Bossard.com.

For more shopping options click here.

Doug Jones
Applications Engineer
djones@bossard.com

June 15, 2018
Read More

What are Rivet Nuts?

What are Rivet Nuts

A rivet nut is a special type of nut that is installed into a prepared hole in a piece of sheet metal and secured prior to assembly of a bolt. A special installation tool is required to ‘set’ the nuts into the prepared hole. The nuts are placed into the hole and ‘upset’ on the backside (much like a blind rivet) which secures them, eliminating the need for a wrench.

Standard rivet nuts have been around for years, and work well as attachment points for low strength joints that do not see much stress. These standard nuts are not high strength and generally cannot support enough clamp load for structural joints.

Uses

Standard rivet nuts must be used with through holes in harder materials such as steel or aluminum and do not work as well in softer materials like wood or plastic. The bulge formed on the backside must have unrestricted space to form and will apply pressure to the plate which could overly stress plastic or wood.

Specialty type rivet nuts exist, such as the BCT®* which employ bulge control technology to allow them to work in blind holes and/or soft materials such as plastic. There is also a high strength version of BCT® which may be used in structural joints and can create high clamp loads for use with high strength bolts.

If you are currently using weld nuts, or have areas with limited access to one side, consider looking at rivet nuts. Contact us at ProvenProductivity@Bossard.com for more information. Look for a future blog discussing tools for the installation of rivet nuts.

For more shopping options click here.

*BCT® is a registered trademark owned by BBA srl Italy
June 08, 2018
Read More

How to Choose the Best Thread Protrusion Length

Length of Thread Protrusion

How many threads should protrude through a nut in an optimal joint?

The generally accepted answer is 1 to 3 threads. Most externally threaded fastener blanks are manufactured with a header point prior to thread rolling, which leaves the first 1 to 2 threads undersized for ease of assembly. To ensure full load carrying capability for a nut and bolt combination, this rule makes sure we have fully formed threads throughout the entire thickness of the nut.

One notable exception to this is for nuts with a locking feature at the top – or toplock nuts. This includes all nylon insert nuts. For these, it is best to have a minimum of 3 threads protruding through the nut to ensure that the locking feature is engaged on a fully formed external thread. Anything less could compromise the locking affect.

Is there a rule for the maximum number of threads protruding through a nut?

Too many threads is a waste of material, adds unnecessary weight and can be a hazard or cause interference with other components. However, functionally there is no downside to having too much thread protrusion.

When selecting fastener lengths, be conscious of the standard length increments. Metric fasteners are generally available in 5mm length increments up to 70mm and 10mm increments beyond this. Inch fasteners have similar standards. When choosing your fastener lengths, it is best to select the shortest fastener that will consistently give you 1-3 threads protruding through the nut.

For questions, please contact our Bossard engineering team at ProvenProductivity@Bossard.com.

Doug Jones
Applications Engineer
djones@bossard.com

June 01, 2018
Read More

How to Improve Your Thread Forming Screw Design

Design Recommendations for Thread Forming Screws

Thread forming screws per DIN 7500 produce a chip-free, gage correct metric internal thread into ductile metals up to 160HV hardness. Thread forming screws may be reused up to 20 times, but care must be taken when re-starting screws to avoid cross threading. They are not intended for use in brittle metals such as gray cast iron; however, they can be used in non-ferrous metals and light metals, as well as steel.

Screw Hole Preparation

Hole preparation and hole size are key to trouble free assemblies with thread forming screws. In general, the material thickness should be 1xd minimum (for example, a 6mm plate for a M6 screw). Punching, drilling or laser cutting are common methods for creating through holes for thread forming screws. Different hole sizes may be required for each method based on the break-out of a punched hole, or the size of the heat affected zone of a laser cut hole, which makes the surface harder and more difficult to thread. Different material composition and thickness will also require different hole sizes.

Good design practice requires a countersunk hole as thread forming will slightly raise the surface of the mating part without the chamfer. This can cause mating parts to not sit flush against the tapped component creating a gap.

Assembly Torque

Recommended assembly torque is 80% of the breaking torque of the screw, and half way between the driving torque and the breaking torque. Drive torque and strip/break torque is recommended to select the optimum hole size for your application.

Check out www.bossard.com for more recommendations for thread forming screws, or contact us directly at ProvenProductivity@Bossard.com to perform a drive/strip torque test for your application.

For more shopping options click here.

Doug Jones
Applications Engineer
djones@bossard.com

May 25, 2018
Read More

Quick Guide: Austenitic Stainless Steel Fasteners

Stainless Steel Fasteners

Are you thinking about using stainless steel fasteners in your next application but aren’t sure if it’s the right fit? Read on to see if it’s the right fit for your product.

Austenitic Stainless Steel

Austenitic stainless steel is by far the most common material used to manufacture stainless steel fasteners. It has a chromium content between 15 and 20 percent and a nickel content between 5 and 19 percent. It offers the highest corrosion resistance than martensitic stainless steel and ferritic stainless steel. It is also considered to be non-magnetic. The tensile strength may vary between 72,000 psi and 115,000 psi. Austenitic stainless steel is not heat treatable however the strength of this material may be improved by cold working or strain hardening.

18-8

The material that is commonly referred to as 18-8, is a type of austenitic stainless steel that contains approximately 18% chromium and 8% nickel. Austenitic stainless steel includes AISI grades 302, 303, 304, 304L, 316, 32, 347, & 348.

For more information about stainless steel fasteners and how you can use them in your applications, contact us at ProvenProductivity@Bossard.com.

For more shopping options click here.

May 18, 2018
Read More

Why Your Fastener is Loose and How to Fix It

Keeping Fastened Joints Tight

Do you have a fastened joint that keeps coming loose? Before proposing a solution, we first need to understand why it’s coming loose.

Reasons for a Fastened Joint Being Loose

  1. Is there visible damage to the surfaces under the head of the bolt or nut? If so, you may have an embedment issue where the surface of the clamped material is not hard enough to support the load of the joint. The best way to address this is to increase the surface area of the fastener by using hardened washers or flanged hardware.
  2. If embedment is not your issue, but you have loose hardware, then rotational loosening is occurring. Some things to check for:
  • What is the clamping length of your joint? 5 times the diameter of the bolt is recommended to ensure proper bolt stretch.
  • Is the proper clamp load being applied? See your hardware supplier to help with bolted joint calculations or a joint study to determine the proper torque to achieve your desired clamp load.

Fixing the Loose Fastened Joint

 Sometimes it is not possible to employ the 5 times the diameter rule, and we still have loosening. Several strategies may be used to help combat this issue.

  1. Thread locking
    • Thread forming screws
    • Pre-applied locking adhesive
    • Liquid thread lockers applied during assembly
    • Lock nuts
  2. Locking at the bearing surface
    • Serrated hardware – make sure to use serrated nuts AND bolts
    • Locking washers
      • Rip-Lock™ – good for up to and including 8.8 property class
      • Ribbed lock washers – good for 10.9
      • Nord-Lock® – good for up to and including 12.9 property class

For more information on keeping joints tight, check out www.bossard.com or contact our engineering department at ProvenProductivity@bossard.com.

For more shopping options click here.

Doug Jones
Applications Engineer
Email: djones@bossard.com

May 04, 2018
Read More

Want to Convert to Metric Fasteners?

Converting to Metric Fasteners

Many companies that have been designing with inch (imperial) fasteners for years are very hesitant to switch over to metric. Why would anyone ever use metric hardware? Where we have seen the most interest is from companies who are expanding into global markets. Most countries other than the US are using metric fasteners and for them, imperial fasteners are a mystery.

Metric is simple once you get the hang of it, and some things even make more sense, such as the marking of property classes (grades) on nuts and bolts. The metric system uses numbers stamped into the head or face of the nut rather than symbols that we use for inch hardware. For bolts, the first number indicates the strength in MPa while the second number tells us the percentage of yield strength.

For example:

Property class 10.9 – 10 indicates a tensile strength of 1000MPa, 9 indicates that the yield strength is 90% of tensile.

Property class 8.8 – 8 indicates a tensile strength of 800MPa, 8 indicates that the yield strength is 80% of tensile.

Metric Fasteners Chart

A quick comparison of grades and property classes is shown below:

Grade (inch) Property Class (metric)
5 8.8
8 10.9
Alloy Steel 12.9

If you are considering a conversion to metric hardware, contact Bossard at ProvenProductivity@Bossard.com, or check our technical resources at www.bossard.com including an inch to metric calculator that is also available as an iPhone app.

For more shopping options click here.

Doug Jones
Applications Engineer
Email: djones@bossard.com

April 20, 2018
Read More

3 Types of Joint Studies

Joint Study

The purpose of a joint study is to understand the forces acting on the assembly during tightening. A joint study may be necessary if you have a critical joint or if you are having warranty claims that can be linked back to joint failure.  When is a joint considered critical? If the failure of the joint may cause injury or have a serious monetary impact, it should be considered critical.

Typical Types of Joint Studies

1.Torque Tension Analysis

This study is used to make sure that your prescribed torque is achieving your intended clamp load. Low clamp load may lead to loosening through embedment, rotational loosening and/or fatigue which all can result in failure of the joint. High clamp load may yield the fasteners or the mating joint components, lowering their clamping force which can also result in failure of the joint.

2.Drive & Strip Torque Analysis for Thread Forming Screws

Performance of thread forming screws in both metal and plastic are greatly dependent on the hole size and preparation. The correct hole size should offer a good balance between low drive torque and high strip torque which can be determined through testing. These types of joints aren’t often as sensitive to the amount of clamp load they retain, but choosing the proper hole size and assembly torque will greatly affect the joint’s performance.

3.Vibration Analysis

Joints subjected to vibrational forces may experience loosening and eventual failure if not designed properly. Different types of fasteners and locking features are often utilized to address vibrational loosening. Performing a vibration study helps to select the proper hardware for your specific situation.

To learn more about joint studies and to talk to an engineer about your project, contact us through ProvenProductivity@bossard.com.


Doug Jones
Applications Engineer
djones@bossard.com

April 13, 2018
Read More